Advice & guides › Prevention & Maintenance
Stop Dripping Taps: DIY Fixes & Prevention Guide UK
By The FixDelivered Team · Updated 2026-09-10 · 6 min read
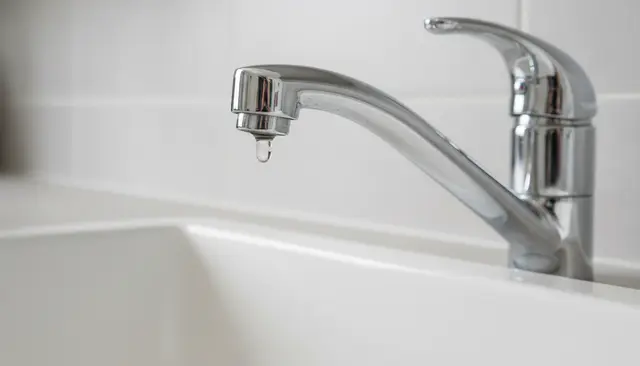
A constantly dripping tap is more than just an annoying sound; it's a significant waste of water and can add to your utility bills over time. Whether it's a slow drip or a steady stream, understanding why your tap is leaking and how to address it can save you money and prevent potential water damage. This guide will walk you through the common causes of dripping taps, explain how to perform a simple DIY fix for common types, and offer advice on prevention.
Why Do Taps Drip? Common Causes
Most dripping taps stem from worn-out components inside the tap itself. The specific part depends on the type of tap you have:
- Worn Washers (Compression Taps): Traditional compression taps rely on a rubber washer to create a watertight seal when the tap is turned off. Over time, these washers can harden, crack, or become compressed, preventing a complete seal and leading to drips.
- Damaged Cartridges (Mixer Taps): Modern mixer taps, especially those with a single lever, use ceramic disc cartridges. These cartridges contain two ceramic discs that slide against each other. If these discs become scratched, chipped, or if the seals around the cartridge degrade, water can leak through.
- High Water Pressure: Excessively high water pressure can put strain on a tap's internal components, accelerating wear and potentially forcing water past seals.
- Sediment Build-up: Limescale and other mineral deposits, particularly in hard water areas, can accumulate on tap components, preventing them from sealing correctly.
- Loose Components: Sometimes, a drip can be as simple as a loose gland nut or other internal fitting that isn't tightened sufficiently.
Understanding Your Tap Type
Before you can fix a dripping tap, it's helpful to identify what kind you have:
- Compression Taps: These are the most traditional type, typically with separate hot and cold handles that you turn multiple times to open and close. They use rubber washers to stop the flow of water.
- Mixer Taps (Ceramic Disc Cartridge): These often have a single lever or a quarter-turn handle. They don't use rubber washers but instead rely on ceramic discs within a cartridge to control water flow.
DIY Fix: How to Stop a Dripping Compression Tap
Fixing a dripping compression tap by replacing a washer is a common and relatively straightforward DIY task. If you have a mixer tap, the process involves replacing the entire cartridge, which can be more complex and require a specific replacement part. For mixer taps, or if you're unsure, it's often best to consult a professional.
Tools You'll Need:
- Adjustable spanner or set of spanners
- Screwdriver (flathead or Phillips, depending on your tap)
- New rubber washer(s) of the correct size (take the old one to a DIY store or plumbing merchant to match)
- PTFE tape (optional, but good for sealing threads)
- Cloth or towel
- Bucket or bowl
Safety Cautions:
- Always turn off the water supply before starting.
- Be careful not to overtighten components during reassembly, as this can damage threads.
- Protect your sink and work area from scratches.
Step-by-Step Instructions:
- Turn Off the Water Supply: Locate your home's main stopcock (usually under the kitchen sink, in a utility room, or by the front door) and turn it off. For a single tap, you might have isolation valves on the pipes beneath the sink – turn these clockwise until they stop.
- Drain the Tap: Open the tap you're working on (and any other lower taps in the house) to drain any remaining water from the pipes.
- Remove the Decorative Cap: Most taps have a small decorative cap (often plastic or metal) on top of the handle. Carefully pry this off with a small flathead screwdriver.
- Unscrew the Handle: Underneath the cap, you'll find a screw. Unscrew this and lift the tap handle off.
- Remove the Gland Nut/Shrouding: You'll now see the tap's headwork. There might be a decorative shroud or a gland nut holding it in place. Use your adjustable spanner to carefully unscrew this.
- Extract the Tap Headwork: Once the gland nut is loose, you should be able to unscrew or pull out the entire headwork assembly.
- Locate and Replace the Washer: At the bottom of the headwork, you'll find the rubber washer, often held in place by a small screw. Remove the screw, take out the old washer, and replace it with a new one of the exact same size. You might also want to replace the O-ring around the spindle if it looks worn.
- Reassemble the Tap: Put the tap headwork back into the tap body, re-tighten the gland nut (use PTFE tape on the threads if desired for a better seal), replace the handle, and screw the decorative cap back on.
- Restore Water Supply and Check for Leaks: Slowly turn your main stopcock or isolation valve back on. Open the repaired tap slightly to let air escape, then close it. Check carefully for any drips or leaks around the base of the tap.
When to Call a Professional for DIY Fixes:
While fixing a compression tap is manageable for many, there are times when it's best to call in an expert:
- If you cannot locate or turn off your water supply.
- If any part of the tap is seized, corroded, or won't come apart easily.
- If the leak persists after replacing the washer.
- If you have a mixer tap and are unsure about replacing the cartridge.
- If you simply don't feel confident undertaking the repair yourself.
For any of these situations, or if you need an emergency plumber near you, FixDelivered can connect you with qualified local tradespeople quickly and efficiently.
Preventative Maintenance for Your Taps
A little care can go a long way in extending the life of your taps and preventing future drips:
- Don't Overtighten: Turning a tap too hard can prematurely wear out washers and internal components. A gentle turn should be enough to stop the water flow.
- Regular Cleaning: In hard water areas, limescale can build up. Regularly clean your taps, especially around the spout and handles, to prevent mineral deposits from affecting seals.
- Check Water Pressure: If you suspect high water pressure, a plumber can install a pressure reducing valve (PRV) to protect your plumbing system.
- Address Leaks Promptly: Don't ignore a small drip. The sooner you address it, the less likely it is to cause further damage or become a bigger problem.
By understanding why taps drip and taking proactive steps, you can keep your home's plumbing in good order. If you find yourself needing professional help, remember that FixDelivered makes it easy to get a plumber now. You can also learn more about how FixDelivered works on our website.
Frequently asked questions
How much water does a dripping tap waste?
A tap dripping once per second can waste over 15 litres of water per day, adding up to more than 5,500 litres a year. This can significantly increase your water bill and is wasteful of a precious resource.
Can I replace a mixer tap cartridge myself?
Replacing a mixer tap cartridge is generally more complex than changing a washer in a compression tap. It requires identifying the correct replacement cartridge, which can vary significantly between tap models. While possible for a confident DIYer, many prefer to call a professional plumber to ensure the job is done correctly and to avoid potential leaks or damage.
How often should I check my taps for drips?
It's a good idea to visually inspect your taps for any signs of dripping or leaks periodically, perhaps once every few months or as part of a general home maintenance routine. Addressing small issues early can prevent them from becoming larger, more costly problems.
Need a plumber now? Tell us your emergency and FixDelivered will find and confirm an available local plumber near you, usually within the hour.
Written by the FixDelivered Team. Reviewed by Rupert Lowe, Editor. Last updated 2026-09-10.