Ceiling Leak: Find the Source & Stop Damage Fast
By The FixDelivered Team · Updated 2026-09-09 · 6 min read
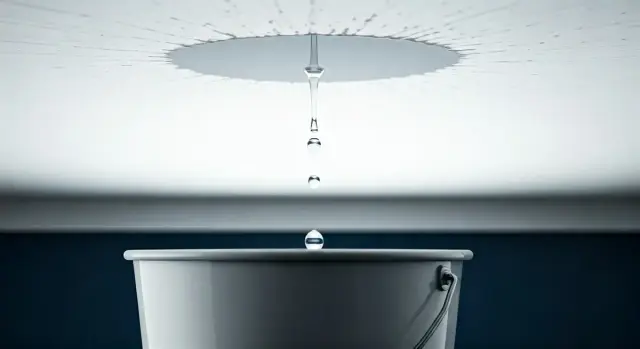
Finding water leaking through your ceiling can be a highly stressful and alarming experience. It demands immediate action to prevent extensive damage to your property and to ensure safety. This comprehensive guide will walk you through the crucial steps to take when faced with a ceiling leak, from limiting the initial damage to systematically finding its source and knowing when to call in a professional plumber.
Immediate Steps to Limit Damage
When you spot water leaking through your ceiling, immediate action is crucial to prevent further damage and ensure your safety. Don't panic, but do act swiftly.
1. Prioritise Safety: Turn Off Electricity
Water and electricity are a dangerous combination. If the leak is near light fittings, electrical sockets, or any electrical appliances, your first priority is to cut the power to that area, or ideally, to your entire home at the consumer unit (fuse box). This minimises the risk of electrocution or electrical fires.
2. Shut Off the Water Supply
Stopping the flow of water at its source is critical. Locate your property's main stopcock and turn it off. This is typically found under the kitchen sink, in a downstairs toilet, or near the incoming water pipe, often at the front of the house. Turning it off will stop all water supply to your home, which is essential until the leak is contained or fixed.
3. Contain the Water
While you're working to find the source, try to minimise the water damage. Place buckets or bowls directly under the leak. If the ceiling is bulging, gently poke a small hole in the centre of the bulge with a screwdriver or similar tool to allow the water to drain into a container. This relieves pressure and can prevent a larger, more uncontrolled collapse. Use old towels and mops to soak up any water on the floor.
Finding the Source of the Leak
Once the immediate danger is managed, the next step is to locate where the water is coming from. This can be challenging, but a systematic approach helps.
Common Leak Locations
- Upstairs Bathroom or Kitchen: This is often the most common culprit. Check toilets (cisterns, seals, supply lines), showers (grout, seals, trays, waste pipes), baths (overflows, waste pipes, taps), sinks (taps, waste traps), and appliances like washing machines or dishwashers (hoses, connections).
- Roof or Attic: If the leak is on an top-floor ceiling, the issue could be with your roof. Look for damaged or missing tiles, faulty flashing around chimneys or skylights, or issues with the loft water tank or associated pipework.
- Heating System: Leaks can originate from central heating pipes, radiators, or the boiler itself. If the water is warm or the leak is worse when the heating is on, this is a strong indicator. Remember: any work on a gas boiler or gas appliance must only be carried out by a Gas Safe registered plumber. Attempting to fix these yourself is illegal and extremely dangerous.
- Condensation: While less common for significant leaks, severe condensation in an unventilated loft space can sometimes lead to dripping, mimicking a leak. This usually produces smaller, intermittent drips rather than a steady flow.
DIY Guide: Tracing an Upstairs Bathroom Leak
If the leak is directly below an upstairs bathroom, you can often narrow down the source with a bit of careful investigation.
Tools You Might Need:
- Buckets and old towels
- Torch
- Screwdriver set (flathead and Phillips)
- Adjustable spanner or pipe wrench
- Rubber gloves
- (Optional) Moisture meter
Step-by-Step Investigation:
- Check the Toilet: First, look for any visible water around the base of the toilet or behind the cistern. Flush the toilet several times and watch for any drips from the supply line, the flush mechanism, or the waste pipe connections.
- Inspect the Shower/Bath: Ensure the shower curtain or screen is properly directing water into the tray or bath. Run the shower or fill the bath and then drain it, carefully checking around the waste, overflow, and the seals where the tray/bath meets the wall. Look for cracks in grout or sealant.
- Examine the Sink: Check the U-bend (trap) and waste pipe underneath the sink. Tighten any loose connections. Run the tap for a few minutes and observe for drips from the tap base, supply lines, or the waste assembly.
- Look at Radiator Pipes: If there's a radiator in the bathroom, check its valves, connections, and the body for any signs of corrosion or dripping.
When to Call a Professional:
If you've followed these steps and still can't find the source, or if the leak is persistent and significant, it's time to call in an expert. Don't risk further damage or your safety by attempting repairs beyond your skill level.
After the Leak is Stopped: Assessment and Next Steps
Once the water flow has stopped, your focus shifts to assessing and repairing the damage.
Drying Out the Area
Open windows and use fans or dehumidifiers to dry out the affected area thoroughly. This is crucial to prevent mould growth and further structural damage. It can take several days for an area to dry completely.
Assessing Damage and Repairs
Carefully inspect the ceiling, walls, and flooring for damage. This might include plasterboard sagging, paint peeling, or staining. Depending on the extent, repairs could range from simple re-painting to replacing sections of plasterboard. For significant structural concerns, a builder or surveyor might be needed.
Insurance Claims
Most home insurance policies cover sudden and accidental water damage, but it's essential to check your specific policy details, including your excess. Document everything with photos and keep records of all communications and expenses. Contact your insurer as soon as possible.
When Professional Help is Essential
While some minor leaks can be DIY fixes, many require the expertise of a qualified plumber. Knowing when to call a professional can save you time, money, and prevent more severe issues.
- Inaccessible Leaks: If the leak is behind walls, under floors, or in the loft where access is difficult, a professional will have the tools and experience to locate and fix it without causing unnecessary additional damage.
- Gas or Boiler Issues: As reiterated, any leak related to your boiler or a gas appliance absolutely requires a Gas Safe registered plumber.
- Major Water Damage: If the leak has caused significant water damage, or if you suspect structural integrity is compromised, a professional assessment is vital.
- Lack of Confidence: If you're unsure about any step or feel uncomfortable tackling the problem, it's always best to err on the side of caution and call an expert.
If you're facing a complex leak or need immediate professional assistance, FixDelivered can help. You can quickly find emergency plumbers near you who are qualified to tackle all types of plumbing emergencies. Our platform makes it easy to find and book a trusted local plumber, with transparent pricing and a refundable booking fee if no plumber is found, giving you peace of mind during a stressful situation.
Dealing with a ceiling leak can be daunting, but by following these steps, you can effectively limit damage and address the problem efficiently. For peace of mind and swift resolution, you can always tell us your emergency and connect with a trusted local plumber through FixDelivered.
Frequently asked questions
What's the very first thing I should do if water is leaking through my ceiling?
Immediately turn off the electricity to the affected area or your entire home at the consumer unit, then shut off your main water supply using your stopcock. After that, place buckets and towels to contain the water.
Can I fix a ceiling leak myself?
It depends on the source. Simple issues like a loose toilet connection or a worn shower seal might be DIY-friendly. However, if the leak is inaccessible, involves your heating system, or is related to a gas appliance, you should always call a qualified plumber. Never attempt to work on gas appliances yourself.
Will my home insurance cover a ceiling leak?
Most UK home insurance policies cover 'sudden and accidental' water damage. However, they typically won't cover damage caused by gradual leaks or lack of maintenance. Always check your specific policy documents and contact your insurer as soon as possible after discovering the leak.
How can I prevent future ceiling leaks?
Regular home maintenance is key. Periodically check plumbing fixtures, appliance hoses, and visible pipes for signs of wear or leaks. Inspect your roof for damaged tiles or flashing, and ensure your loft water tank (if you have one) is in good condition. Address any minor drips or damp patches quickly before they escalate.
How much does it typically cost to fix a ceiling leak in the UK (2026)?
The cost varies significantly depending on the source and severity. A simple repair like tightening a connection might cost £80-£150 for a plumber's call-out and labour. More complex issues involving pipe replacement, tracing a hidden leak, or extensive damage could range from £250 to over £1000, plus the cost of ceiling repairs. Always get an upfront quote.
Need a plumber now? Tell us your emergency and FixDelivered will find and confirm an available local plumber near you, usually within the hour.
Written by the FixDelivered Team. Reviewed by Rupert Lowe, Editor. Last updated 2026-09-09.