Toilet Leaking from Base: Causes & Quick Fixes
By The FixDelivered Team · Updated 2026-09-21 · 9 min read
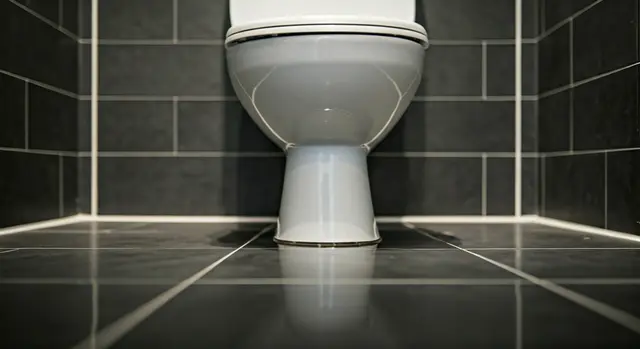
Finding water around the base of your toilet can be alarming. Not only is it unhygienic, but a persistent leak can lead to costly water damage to your flooring, subfloor, and even the ceiling below. Identifying the source quickly and taking action is crucial. This guide will walk you through the common causes, immediate steps, and practical solutions for a toilet leaking from its base in your UK home.
Why Your Toilet is Leaking from the Base
Before you can fix the problem, you need to understand what's causing it. Here are the most common reasons you might find water around the base of your WC:
- Worn or Damaged Wax Seal/Donut Washer: This is by far the most frequent culprit. The wax seal (or foam/rubber donut washer on some modern toilets) creates a watertight seal between the bottom of the toilet pan and the waste pipe flange in the floor. Over time, these seals can dry out, crack, or shift, especially if the toilet moves slightly.
- Loose Toilet Pan Bolts: The bolts that secure your toilet pan to the floor can loosen over time. This movement can break the seal between the pan and the waste pipe, leading to leaks.
- Cracked Toilet Pan: A crack in the ceramic of the toilet pan itself, often hidden or hairline, can allow water to seep out. This is a more serious issue that usually requires replacing the entire toilet.
- Cistern Leaks (Misdiagnosed): Sometimes, water appearing at the base isn't actually coming from the base seal. A leak from the cistern (the tank at the back), such as a faulty fill valve, flush valve, or a loose connection, can cause water to run down the outside of the pan and pool at the base.
- Condensation: In very humid conditions, cold water in the cistern can cause condensation to form on the outside surface. This isn't a leak, but the droplets can run down and create puddles that mimic a leak. This is more common in summer or if your bathroom isn't well-ventilated.
First Steps: What to Do Immediately
As soon as you notice a leak, take these immediate actions to prevent further damage:
- Turn Off the Water Supply: Locate the isolation valve (stopcock) for your toilet, usually on the pipe leading to the cistern. Turn it clockwise until the water stops. If you can't find one for the toilet, you may need to turn off the main stopcock for your house.
- Mop Up the Water: Use towels or a mop to thoroughly dry the area around the toilet. This helps prevent water damage and makes it easier to identify the exact source of the leak.
- Identify the Source: Once the area is dry, turn the water supply back on briefly and flush the toilet. Watch carefully to see exactly where the water emerges. Is it immediately when you flush? Is it a slow drip? Does it only appear when the cistern refills? This observation is key to diagnosis. If the water runs down the back of the toilet from the cistern, the leak is likely higher up. If it appears directly from beneath the toilet after flushing, it's probably the pan seal.
DIY Fix: Replacing the Toilet Pan Seal
If you've determined the leak is coming from the pan seal (wax ring or donut washer), this is a DIY job a competent homeowner can often tackle. This guide assumes your toilet is a two-piece unit (separate cistern and pan) or a close-coupled unit where the cistern sits directly on the pan.
Tools You'll Need:
- Adjustable spanner or wrench
- Flathead and Phillips screwdrivers
- Utility knife or scraper
- Rags and old towels
- Bucket or shallow tray
- New wax seal or donut washer (ensure it's the correct type for your toilet and waste pipe)
- Gloves (for hygiene)
- Safety goggles (optional, but recommended)
Safety Cautions:
- Always turn off the water supply before starting.
- Toilets can be heavy and awkward to lift. If you're unsure or have back issues, get help.
- Wear gloves for hygiene.
- Be careful with ceramic; it can crack if dropped or handled roughly.
Step-by-Step Guide:
- Turn Off Water & Empty Cistern: Turn off the water supply to the toilet and flush it to empty the cistern as much as possible. Hold the flush handle down to drain all remaining water.
- Disconnect Water Supply: Use your spanner to disconnect the flexible supply pipe from the fill valve on the underside of the cistern. Have a small bucket or towel ready to catch any residual water.
- Remove Cistern Bolts (if applicable): If your toilet has a separate cistern, you'll need to disconnect it from the pan. There are usually two bolts underneath the cistern that pass through the pan. Loosen and remove these bolts. Carefully lift the cistern off and set it aside.
- Remove Pan Bolts: Locate the two bolts that secure the toilet pan to the floor. These are often covered by decorative caps. Remove the caps, then use your spanner to loosen and remove the nuts.
- Carefully Lift and Remove Toilet: Gently rock the toilet pan to break the old seal. Lift the toilet straight up and off the waste pipe flange. Be prepared for some residual water in the pan. Place the toilet carefully on its side on old towels or cardboard to avoid scratching your floor or damaging the pan.
- Scrape Off Old Seal: Use your utility knife or scraper to thoroughly remove all traces of the old wax seal from the bottom of the toilet pan and the waste pipe flange on the floor. Clean the areas completely to ensure a good new seal.
- Inspect & Clean Flange: Check the waste pipe flange for damage or cracks. Clean any debris from around the opening.
- Install New Seal: Place the new wax seal or donut washer firmly onto the waste pipe flange in the floor, or onto the horn of the toilet pan (check the manufacturer's instructions for your specific seal type). Ensure it's centred.
- Reposition Toilet: Carefully lift the toilet pan and align it over the waste pipe flange. Lower it straight down, ensuring the pan bolts align with the holes in the floor. Apply gentle, even pressure to compress the new seal. Avoid rocking the toilet once it's set, as this can break the seal.
- Secure Toilet: Reinstall the pan bolts and tighten them gradually and alternately, ensuring the toilet is stable and level. Do not overtighten, as this can crack the ceramic.
- Reconnect Cistern & Water (if applicable): If you removed the cistern, reattach it to the pan, ensuring a new doughnut washer is used between the cistern and pan if required. Reconnect the water supply pipe to the fill valve.
- Test for Leaks: Slowly turn the water supply back on. Let the cistern fill, then flush the toilet several times. Watch carefully around the base for any signs of water. Check all connections you've worked on.
When to Call a Professional:
While replacing a wax seal is a common DIY task, there are times when it's best to call in an expert. If you find a crack in the toilet pan, if you're unable to lift the toilet safely, if the leak persists after your repair attempt, or if you're simply not confident undertaking the work, a professional plumber is your best bet. For urgent assistance, you can find emergency plumbers near you quickly through FixDelivered.
Other Potential DIY Fixes
- Tightening Pan Bolts: If the toilet pan feels wobbly, carefully tighten the bolts that secure it to the floor. This might re-establish the seal if it was only slightly compromised. Do not overtighten.
- Checking Cistern Connections: If the leak appears to be running down from the cistern, check the connections where the cistern meets the pan, and the water supply pipe connects to the cistern. A simple tightening or replacing of a rubber washer might solve it.
When to Call a Professional Plumber
While some leaks are manageable DIY projects, others require expert attention. You should call a professional plumber if:
- You have a cracked toilet pan: This requires a full toilet replacement.
- The leak persists after your DIY attempts: This indicates a more complex issue or an incorrect repair.
- You're unsure of the cause: A plumber can quickly diagnose the exact source of the leak.
- You're unable to lift the toilet safely: Toilets are heavy, and improper lifting can lead to injury or damage.
- You're uncomfortable with plumbing work: It's always better to ensure the job is done correctly to prevent future, more costly damage.
If you're facing a stubborn leak or a cracked pan, it's time to call in the experts. Tell us your emergency and we can connect you with qualified local plumbers.
Cost of Repairing a Leaking Toilet Base (2026 UK Guide)
The cost of fixing a leaking toilet base in the UK can vary based on the complexity of the issue, whether you do it yourself, and your location. These are rough guides for 2026:
- DIY Parts: A new wax seal or donut washer typically costs between £10 and £30.
- Plumber Call-out Fee: Expect to pay £70-£120 for a standard call-out during working hours. For emergency evening or weekend call-outs, this could rise to £150-£250.
- Professional Wax Seal Replacement: Including the call-out fee, parts, and labour, a plumber might charge between £150 and £250 to replace a toilet pan seal.
- New Toilet Installation: If a cracked pan requires a full toilet replacement, the labour cost for installation (excluding the toilet unit itself) could be £150-£350, with a basic new toilet unit adding £150-£250. Total costs could range from £300-£600+.
These figures are estimates, and it's always advisable to get a few quotes. With FixDelivered, the plumber's callout fee is agreed upfront and paid directly to them, so you'll know where you stand.
Preventative Measures
- Regular Checks: Periodically check around the base of your toilet for any signs of moisture.
- Avoid Harsh Cleaners: Some strong chemical cleaners can degrade rubber and plastic components over time.
- Don't Sit on the Cistern: This can put undue stress on the toilet pan and its connections, potentially loosening bolts or cracking ceramic.
- Ensure Proper Installation: When installing a new toilet, ensure it's level and all bolts are tightened correctly, but not overtightened.
Conclusion
A toilet leaking from its base is a common plumbing issue that, if left unaddressed, can lead to significant and costly damage. By understanding the causes and following the appropriate steps – whether it's a DIY seal replacement or calling in a professional – you can resolve the problem effectively and protect your home. For other plumbing issues, browse our plumbing emergency guides.
When you need reliable, qualified help, FixDelivered connects you with local plumbers quickly. Learn more about how FixDelivered works and get your plumbing emergency sorted.
Frequently asked questions
Why is my toilet leaking from the base?
The most common reasons for a toilet leaking from its base include a worn or damaged wax seal/donut washer between the toilet pan and the waste pipe, loose toilet pan bolts, a hidden crack in the toilet pan, or water running down from a leak in the cistern.
Can I fix a leaking toilet base myself?
Yes, if the leak is due to a faulty wax seal or loose pan bolts, many competent homeowners can fix it themselves by replacing the seal or tightening the bolts. However, if there's a crack in the toilet pan or you're unsure, it's best to call a professional.
How much does it cost to fix a leaking toilet base in the UK?
In 2026, DIY parts for a wax seal typically cost £10-£30. A professional plumber's call-out for a wax seal replacement, including parts and labour, usually ranges from £150-£250. Costs for a full toilet replacement due to a cracked pan would be higher, typically £300-£600+.
Is a leaking toilet base an emergency?
A persistent or significant leak from the toilet base should be treated as an urgent issue to prevent extensive water damage. While not always an immediate 'burst pipe' emergency, it requires prompt attention. Turn off the water and assess the situation as quickly as possible.
What tools do I need to replace a toilet wax seal?
You'll typically need an adjustable spanner or wrench, screwdrivers, a utility knife or scraper, rags, a bucket, a new wax seal or donut washer, and gloves. You might also need help to lift the toilet pan safely.
Need a plumber now? Tell us your emergency and FixDelivered will find and confirm an available local plumber near you, usually within the hour.
Written by the FixDelivered Team. Reviewed by Rupert Lowe, Editor. Last updated 2026-09-21.