Replace a Radiator Valve or Fit a TRV: A UK DIY Guide
By The FixDelivered Team · Updated 2026-10-01 · 8 min read
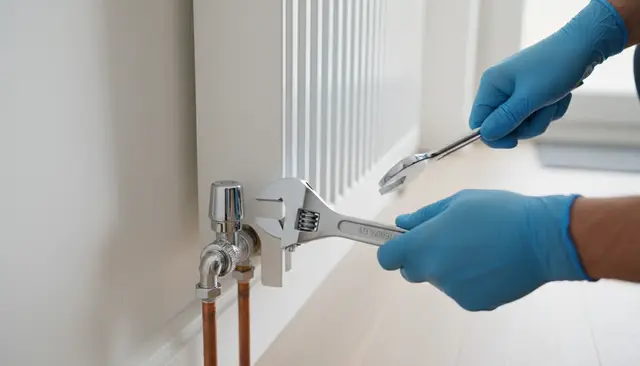
Radiator valves are crucial components of your central heating system, controlling the flow of hot water into each radiator. Whether you're dealing with a leaking old valve or looking to upgrade to a more efficient Thermostatic Radiator Valve (TRV), tackling this job yourself can save you money and enhance your home's comfort. This comprehensive UK guide will walk you through the process, providing clear steps, essential tools, and crucial safety advice.
What is a TRV and Why Install One?
A Thermostatic Radiator Valve (TRV) is a self-regulating valve fitted to a hot water radiator, which controls the temperature of a room by automatically adjusting the flow of hot water into the radiator. Unlike standard on/off valves, a TRV has a sensor that reacts to the room's air temperature and opens or closes to maintain a set level.
The benefits of installing TRVs are significant:
- Energy Efficiency: By preventing rooms from overheating, TRVs can significantly reduce your energy consumption and heating bills. You won't be paying to heat unused rooms unnecessarily.
- Increased Comfort: Maintain consistent temperatures in different rooms, allowing you to tailor the warmth to your needs, rather than having a uniform temperature throughout the house.
- Zone Control: Effectively creates heating 'zones' within your home without the need for complex smart heating systems.
- Compliance: Many new build regulations in the UK now require TRVs on most radiators for improved energy performance.
When to Call a Professional
While replacing a radiator valve can be a satisfying DIY project, there are situations where calling a professional plumber is the safest and most sensible option:
- Lack of Confidence: If you're not confident in your abilities to work with plumbing or drain your heating system, it's always best to defer to an expert.
- Old or Corroded System: Older pipework can be brittle or heavily corroded, making it prone to damage or further leaks when disturbed.
- Complex Systems: If you have a particularly complex heating system or underfloor heating, a professional will have the specialist knowledge required.
- Boiler or Gas Issues: Any work involving gas appliances or the internal workings of your boiler, such as the filling loop or expansion vessel, must be carried out by a Gas Safe registered plumber. Never attempt to work on gas yourself.
- Persistent Leaks or Pressure Drops: If you're experiencing ongoing issues that you can't diagnose, a professional can identify and fix the root cause.
If you decide professional help is best, you can tell us your emergency to find a qualified local plumber fast through FixDelivered.
Tools and Materials You'll Need
Before you start, gather all the necessary tools and materials:
- New Radiator Valve/TRV: Ensure it's the correct size (typically 15mm for UK domestic radiators) and type (angled or straight to match your existing setup).
- Adjustable Spanners (x2): Essential for loosening and tightening nuts without twisting pipes.
- PTFE Tape or Thread Sealant: For creating a watertight seal on threaded connections.
- Radiator Key: For bleeding radiators.
- Bucket or Tray: To catch any water when draining.
- Old Towels/Rags: For spills.
- Wire Brush: To clean old threads.
- Pipe Cutters (optional): If you need to adjust pipe lengths.
- Pipe Supports/Clips (optional): If the pipework needs additional securing after removal.
- Hex Key Set (optional): Some TRVs have internal hex adjustments.
- Safety Glasses and Gloves: Protect your eyes and hands.
Safety First
Working with plumbing and heating systems requires caution. Always prioritise safety:
- Turn Off Heating: Always turn off your central heating system at the boiler and allow it to cool completely before starting any work.
- Be Prepared for Water: Even after draining, some residual water will remain. Have buckets and towels ready.
- Wear PPE: Safety glasses will protect your eyes from splashes and debris, and gloves can protect your hands.
- Avoid Overtightening: While connections need to be secure, overtightening can damage threads or crack fittings.
- Electrical Awareness: Be mindful of any electrical wiring near radiators, especially if you have electric radiators or nearby sockets.
Step-by-Step Guide: Replacing a Radiator Valve (and Fitting a TRV)
This guide assumes you are replacing one valve on a single radiator. If you are replacing multiple valves or draining the entire system, the draining steps will differ.
Turn Off Heating and Isolate
Switch off your central heating system at the boiler and allow it to cool down. If you're only working on one radiator, close both the flow and return valves on that specific radiator. If one is a standard valve, turn it clockwise until fully closed. If the other is a lockshield valve, you'll need a spanner to turn it clockwise, noting the number of turns so you can return it to its original setting later.
Drain the Radiator
Place your bucket or tray directly under the valve you intend to replace. Using an adjustable spanner, carefully loosen the large nut that connects the radiator valve to the pipework. Be prepared for water to start dripping out. Once water begins to flow, open the bleed valve at the top of the radiator with your radiator key to allow air in and help the water drain faster. Continue draining until no more water comes out. If draining the whole system, connect a hose to the drain cock (usually found at the lowest point of your system) and run it to an outside drain.
Remove the Old Valve
Once the radiator is fully drained, fully loosen the two nuts connecting the old valve: one to the radiator and one to the pipework. You might need two spanners – one to hold the valve body and one to turn the nut – to avoid twisting the pipe. Carefully remove the old valve.
Prepare the New Valve/TRV
Clean any old sealant or debris from the radiator tail and the pipe threads using a wire brush. Apply PTFE tape to the threads of the pipe connection and the radiator tailpiece in a clockwise direction (as you would tighten the nut). Typically, 10-15 wraps of tape are sufficient. If using thread sealant, apply according to the manufacturer's instructions.
Fit the New Valve/TRV
First, screw the tailpiece of the new valve into the radiator opening. Hand-tighten it, then use a spanner to snug it up. Next, align the main body of the new valve with the pipework. Hand-tighten both nuts (radiator side and pipe side). Again, use two spanners to tighten the nuts – one to hold the valve body steady and the other to turn the nut – to ensure you don't put undue stress on your pipework. Tighten firmly but avoid excessive force. If fitting a TRV, ensure the head is positioned correctly, away from curtains or furniture that could block its sensor.
Refill and Bleed the System
If you only drained one radiator, open both radiator valves on that radiator. If you drained the whole system, close all drain cocks. Begin refilling your central heating system. For a combi boiler, this usually involves opening the filling loop until the pressure gauge reaches the recommended level (typically 1-1.5 bar when cold). For conventional systems, ensure your header tank is filling. Once the system is refilling, go to each radiator, starting from the lowest floor, and open the bleed valve with your radiator key until water comes out steadily, indicating all air has been expelled. Check your boiler pressure again and top up if necessary.
Test for Leaks
Turn your central heating system back on. Once the system is hot and pressurised, carefully inspect all new connections for any signs of leaks or drips. If you find a small leak, try gently tightening the nut a little further. For persistent leaks, you may need to drain the radiator again and re-apply PTFE tape or sealant.
Common Issues and Troubleshooting
- Leaks: Most leaks occur at the connections. Ensure enough PTFE tape was used and the nuts are sufficiently tightened without being overtightened.
- Radiator Not Heating: This usually indicates trapped air. Re-bleed the radiator thoroughly. Check that the new valve is fully open (or the TRV is set to a high enough setting).
- System Pressure Drop: If your boiler pressure repeatedly drops after refilling, it suggests there's still a leak somewhere in the system. Check all connections again.
Cost of Professional Installation (2026 Guide)
If you prefer to have a professional handle the job, understanding the typical costs can be helpful. As a rough guide for 2026, a plumber might charge between £80-£150 per valve for labour, plus the cost of the valve itself (£20-£50 for a standard TRV). This typically doesn't include a separate callout fee if it's part of a larger job, but for a single valve replacement, expect a callout fee of £60-£100 on top.
Total cost for one valve could therefore be in the region of £160-£300. Remember, with FixDelivered, the plumber's callout fee is agreed upfront and paid directly to them, ensuring transparency.
Conclusion
Replacing a radiator valve or upgrading to a TRV is a valuable home improvement that can significantly boost your heating efficiency and comfort. By following this guide, you can confidently tackle the task yourself, saving on labour costs. However, if you're ever in doubt or encounter unexpected issues, don't hesitate to seek professional help.
Whether you choose to tackle it yourself or opt for professional assistance, upgrading your radiator valves is a smart move for your home's efficiency. If you need a qualified local plumber, you can find a local plumber quickly and easily through FixDelivered.
Frequently asked questions
Can I replace a radiator valve myself?
Yes, if you're competent and follow safety steps, replacing a radiator valve is a common DIY task. However, professional help is advised for complex systems, old pipework, or any gas-related issues.
How much does it cost to replace a radiator valve in the UK?
DIY costs typically £20-£50 for the valve itself. Professionally, expect to pay £160-£300 for one valve in 2026, including labour (£80-£150) and a callout fee (£60-£100).
What is a TRV and why should I install one?
A Thermostatic Radiator Valve (TRV) automatically adjusts heat based on room temperature. Installing one saves energy, improves comfort by preventing overheating, and provides better zone control for your heating.
Do I need to drain my whole heating system to replace a radiator valve?
Not always. For a single radiator, you can often isolate and drain just that radiator. However, for multiple valve replacements, if you're unsure about isolating, or if your system is particularly old, draining the whole system is often safer and easier.
Need a plumber now? Tell us your emergency and FixDelivered will find and confirm an available local plumber near you, usually within the hour.
Written by the FixDelivered Team. Reviewed by Rupert Lowe, Editor. Last updated 2026-10-01.