Replace a Toilet Seat: DIY Guide, Even with Stuck Fixings
By The FixDelivered Team · Updated 2026-08-28 · 7 min read
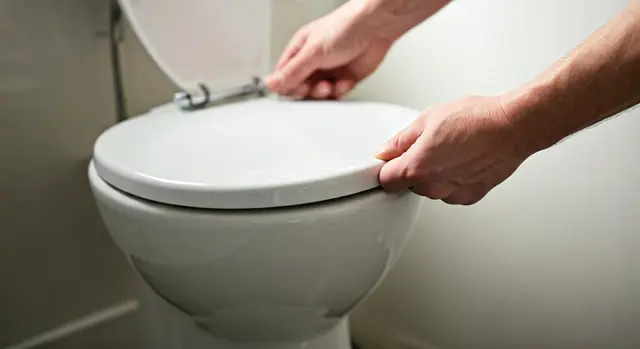
A wobbly, cracked, or stained toilet seat isn't just an annoyance; it can be unhygienic and uncomfortable. Fortunately, replacing a toilet seat is one of the simpler DIY plumbing tasks you can undertake, typically saving you the cost of a professional call-out. This guide will walk you through the process, from choosing the right seat to tackling those notoriously stubborn, stuck fixings.
Why Replace Your Toilet Seat?
There are several compelling reasons to replace an old toilet seat:
- Hygiene: Cracks and discolouration can harbour bacteria, making a clean seat difficult to maintain.
- Comfort: A broken or ill-fitting seat can be uncomfortable and even unsafe.
- Aesthetics: An old, faded seat can detract from the overall look of your bathroom.
- Functionality: Soft-close mechanisms can wear out, and hinges can become loose or break, causing the seat to shift.
Choosing the Right Replacement Toilet Seat
Before you remove your old seat, it's crucial to select a suitable replacement. Toilet seats vary significantly in shape, size, material, and fixing type.
Measure Your Existing Seat
Accurate measurements are key. Use a tape measure to get the following:
- Length: From the front edge of the seat to the centre point between the hinge holes at the back.
- Width: At the widest point of the seat.
- Hinge Hole Distance: The measurement between the centres of the two hinge holes on the toilet pan. This typically ranges from 140mm to 180mm.
Consider the Shape
Toilet pans come in various shapes, and your new seat must match:
- Round (or Oval): The most common shape.
- D-shaped: Flat at the back, with a gentle curve around the front.
- Square: Less common, but increasingly popular in modern bathrooms.
Material and Features
Seats are available in different materials, typically ranging from £20 to £80 in 2026, depending on quality and features:
- Plastic: Lightweight, durable, and easy to clean.
- Wood (MDF or solid wood): Offers a warmer feel but can be heavier and may require more maintenance.
- Soft-Close: A popular feature that prevents the seat and lid from slamming shut, reducing noise and preventing wear.
- Quick-Release Hinges: Allow the seat to be easily detached for thorough cleaning.
Fixing Type
There are two main types of toilet seat fixings:
- Bottom-Fix: The most traditional type, where bolts pass through holes in the ceramic pan and are secured with nuts from underneath.
- Top-Fix: Increasingly common, especially with modern toilets where access underneath the pan is difficult. These fixings drop into the holes and are tightened from above using a screw that expands a rawlplug-like fitting.
Tools You'll Need
Gathering your tools beforehand will make the job much smoother:
- Adjustable spanner or crescent wrench (for bottom-fix nuts)
- Screwdriver (flathead or Phillips, depending on fixings)
- Pliers or mole grips
- Penetrating oil (e.g., WD-40, for stuck bolts)
- Junior hacksaw or multi-tool with a metal cutting blade (for severely seized bolts)
- Safety glasses (if cutting)
- Measuring tape
- Cleaning cloths and all-purpose cleaner
How to Remove Your Old Toilet Seat
This is often the trickiest part, especially if the fixings are corroded.
For Bottom-Fix Seats
- Locate the Fixings: Look underneath the back of the toilet pan. You should see two bolts protruding through the ceramic, each secured with a nut and washer.
- Loosen the Nuts: Use an adjustable spanner or pliers to grip the nut. Turn anti-clockwise to loosen. If the bolt head on top starts spinning, you may need to hold it steady with a screwdriver or pliers from above while turning the nut below.
- Remove the Seat: Once both nuts are removed, lift the old seat off.
For Top-Fix Seats
- Access the Fixings: Most top-fix seats have small plastic or chrome caps covering the fixing points. Gently pry these open with a small flathead screwdriver.
- Unscrew the Bolts: Use the appropriate screwdriver (usually Phillips or a large flathead) to turn the screws anti-clockwise. These screws often expand a fitting inside the toilet pan hole.
- Remove the Seat: Once the screws are loose or removed, lift the seat and the expanding fittings out of the holes.
Dealing with Stuck Fixings
This is where patience and persistence pay off. Old, corroded, or overtightened fixings are a common hurdle.
Bottom-Fix Stuck Fixings- Apply Penetrating Oil: Liberally spray penetrating oil onto the seized nuts and bolts. Let it soak for at least 15-30 minutes, or even longer if possible. Reapply if needed.
- Use Pliers/Mole Grips: If the spanner slips, use mole grips (locking pliers) to get a firmer hold on the nut. For severely rounded nuts, you might need to use a nut splitter, though this is less common for toilet seats.
- Cut the Bolts: If the nuts simply won't budge, your last resort is to cut the bolts. Wear safety glasses. Using a junior hacksaw or a multi-tool with a metal-cutting blade, carefully saw through the bolt shafts just below the ceramic pan. This can be awkward, so take your time and be careful not to scratch the ceramic.
- Penetrating Oil: While less effective on plastic, a little oil might help if the screw is metal and corroded.
- Drill Out Screws: If the plastic screw head strips, you may need to carefully drill out the centre of the screw. Start with a small drill bit and gradually increase the size until the screw can be removed. Be very careful not to damage the ceramic.
- Remove Expanded Fittings: If the expanding rawlplug-style fitting is stuck, try gripping it with needle-nose pliers and twisting while pulling upwards. If it's still stuck, you might need to carefully chip away at the plastic with a small chisel or strong flathead screwdriver, again, being mindful of the ceramic.
How to Install Your New Toilet Seat
Once the old seat is off and the area is thoroughly cleaned, installing the new one is straightforward.
- Assemble Hinges: Follow the instructions provided with your new seat. You'll typically need to attach the hinge posts to the seat itself.
- Position the Hinges: Place the hinge posts into the holes on the toilet pan.
- Secure the Seat:
- For Bottom-Fix: From underneath the pan, slide the washers onto the bolts and then hand-tighten the nuts. Once both are loosely in place, adjust the seat for alignment. When happy, tighten the nuts firmly with your spanner, but do not overtighten, as this can crack the ceramic.
- For Top-Fix: Drop the expanding fittings into the holes, then insert the screws and tighten them from above with a screwdriver. As you tighten, the fittings will expand, gripping the inside of the toilet pan hole. Adjust the seat for alignment before fully tightening.
- Check Alignment and Tightness: Sit on the seat to ensure it feels secure and doesn't wobble. If it does, tighten the fixings a little more. Ensure the seat is perfectly aligned with the pan.
- Attach Covers: If your seat came with decorative caps, snap them into place over the fixings.
When to Call a Professional
While replacing a toilet seat is a common DIY task, there are times when professional help is advisable:
- Damage to the Toilet Pan: If you accidentally crack or chip the ceramic during removal, a plumber can advise on repair or replacement.
- Severely Stuck Fixings: If, despite your best efforts, the fixings simply won't budge, or you're uncomfortable using power tools near ceramic, a professional has specialist tools and experience.
- Other Plumbing Issues: If you notice leaks from the toilet base or cistern while working, this indicates a more complex problem.
If you find yourself in a tricky situation or prefer to have a professional handle it, FixDelivered can connect you with qualified emergency plumbers near you quickly and efficiently.
Maintaining Your New Toilet Seat
To ensure your new toilet seat lasts, clean it regularly with mild soap and water. Avoid harsh abrasive cleaners, which can damage the finish. Check the fixings periodically and gently tighten them if they become loose, but again, avoid overtightening.
Replacing a toilet seat is a satisfying and cost-effective home improvement. By following these steps, you can achieve a fresh, secure, and hygienic update to your bathroom. If you encounter any unexpected issues or simply prefer to leave it to an expert, remember you can always how FixDelivered works to connect you with a professional. Or, for any plumbing emergency, you can always get a plumber now.
Frequently asked questions
How do I know what size toilet seat to buy?
Measure the length (front edge to hinge holes), width (widest point), and the distance between the hinge holes on your existing toilet pan. These measurements will ensure you buy a seat that fits correctly.
Can I replace a bottom-fix seat with a top-fix one?
Yes, as long as your toilet pan has standard hinge holes (typically 140-180mm apart), you can usually fit a top-fix seat. Top-fix seats are designed to secure from above and don't require access underneath the pan.
What should I do if the old toilet seat bolts are rusted solid?
First, apply a generous amount of penetrating oil (like WD-40) to the nuts and bolts and let it soak for at least 15-30 minutes. Use mole grips or an adjustable spanner for a firm hold. If they still won't budge, you may need to carefully cut through the bolts using a junior hacksaw or a multi-tool with a metal-cutting blade, wearing safety glasses for protection.
Need a plumber now? Tell us your emergency and FixDelivered will find and confirm an available local plumber near you, usually within the hour.
Written by the FixDelivered Team. Reviewed by Rupert Lowe, Editor. Last updated 2026-08-28.