Fix a Leaking Sink Trap: UK DIY Guide
By The FixDelivered Team · Updated 2026-09-10 · 6 min read
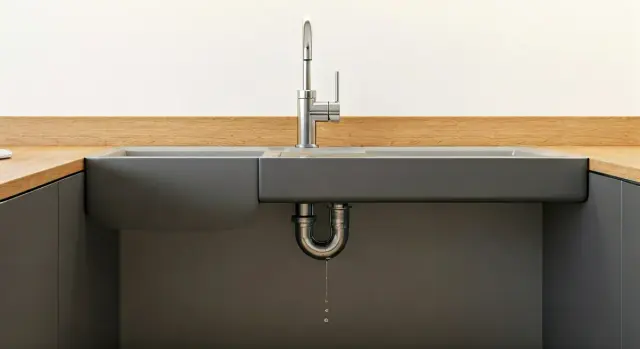
A leaking sink trap might seem like a minor annoyance, but if left unaddressed, it can lead to significant water damage, mould growth, and costly repairs. The good news is that most sink trap leaks are relatively straightforward to fix yourself with a few basic tools and a bit of patience. This guide will walk you through identifying the problem, gathering the right equipment, and providing a step-by-step approach to resolve that pesky drip under your sink.
Why Do Sink Traps Leak?
Understanding the common culprits behind a leaking sink trap can help you quickly pinpoint the issue:
- Loose Connections: Over time, the nuts and fittings that hold the trap components together can loosen due to vibrations, temperature changes, or simply not being tightened enough during installation.
- Worn or Damaged Washers/Seals: The rubber or plastic washers and O-rings inside the trap create a watertight seal. These can degrade, crack, or become dislodged, leading to leaks.
- Cracked or Damaged Trap Components: Plastic traps can crack if overtightened, struck, or exposed to harsh chemicals. Metal traps can corrode over many years.
- Blockages: A severe blockage can cause water to back up and put pressure on the trap, forcing water out through seals or cracks that wouldn't normally leak.
- Incorrect Installation: If the trap wasn't installed correctly in the first place, or if incompatible parts were used, leaks can appear soon after.
Tools You'll Need
Before you begin, gather these essential items:
- Bucket or large bowl (to catch water)
- Towels or old rags
- Adjustable spanner or pipe wrench (for stubborn nuts, but often not needed for plastic traps)
- Screwdriver (if your waste assembly has screws)
- Wire brush or old toothbrush (for cleaning)
- Replacement washers/seals (if you suspect they're the issue – it's often wise to have a set on hand)
- New sink trap (if the old one is cracked or heavily corroded)
- Plumber's grease (silicone-based, to help seal washers)
- Torch or headlamp (for better visibility under the sink)
- Protective gloves
Safety First
Always prioritise safety when undertaking any DIY task:
- Turn off the Water Supply: While a trap leak often only occurs when water is draining, it's always safest to turn off the main stopcock for any plumbing work. This prevents accidental flooding.
- Wear Protective Gear: Gloves will protect your hands from grime and potential sharp edges.
- Ventilate: If you're using any cleaning chemicals (though we advise against strong ones for drains), ensure the area is well-ventilated.
- Electrical Appliances: Be mindful of any electrical sockets or appliances under the sink. Keep them dry and unplugged if necessary.
Step-by-Step DIY Guide to Fixing a Leaking Sink Trap
Follow these steps to tackle most common sink trap leaks:
Prepare the Area
Clear out everything from under the sink. Place your bucket or bowl directly beneath the trap to catch any water that will drain out when you loosen the connections. Lay down towels to absorb spills.
Identify the Leak Source
Turn on the tap briefly and let water run into the sink. Carefully observe the entire trap assembly, from the waste in the sink to where it connects to the wall or floor pipe. Look for drips, trickles, or even just wet spots. This will help you narrow down which connection or component is at fault.
Tighten Loose Connections
Many leaks are simply due to loose slip nuts. Using your hands (plastic traps are often hand-tightened) or an adjustable spanner (for metal traps), gently try to tighten any visible nuts. Be careful not to overtighten, especially with plastic components, as this can cause them to crack. Test the leak again after tightening.
Disassemble the Trap (If Leak Persists)
If tightening doesn't work, you'll need to take the trap apart. Place your bucket securely underneath. Unscrew the slip nuts that connect the trap to the sink waste and to the wall/floor pipe. Carefully remove the U-bend or P-trap section. Expect some water to come out, as traps are designed to hold a small amount of water to prevent sewer gases from entering your home.
Inspect and Clean Components
Once disassembled, thoroughly inspect each part:
- Washers and Seals: Check all rubber or plastic washers and O-rings for cracks, tears, flattening, or signs of wear. These are the most common cause of leaks. If they look compromised, replace them.
- Pipes and Trap Body: Look for any cracks, especially in plastic traps, or significant corrosion in metal traps. If a component is cracked, it will need to be replaced.
- Blockages: Clear out any hair, grease, or debris that might be trapped inside the U-bend. A wire brush or old toothbrush works well for this.
Reassemble and Test
Clean all components thoroughly before reassembling. If replacing washers, apply a thin layer of plumber's grease to new washers to help create a better seal and prevent them from twisting. Reassemble the trap, ensuring all washers are correctly seated. Hand-tighten the slip nuts first, then use your spanner for a final quarter-turn if necessary, being careful not to overtighten. Turn on the tap and let water run freely for a few minutes while carefully checking all connections for any signs of leakage. Feel around with a dry paper towel for any dampness.
When to Call a Professional
While many sink trap leaks are DIY-friendly, there are times when it's best to call in an expert:
- Persistent Leaks: If you've followed these steps and the leak persists, there might be a more complex issue at play that requires professional diagnosis.
- Beyond the Trap: If the leak originates from the main drain pipe in the wall, the sink waste assembly itself, or any area you're uncomfortable accessing, a plumber is needed.
- Damaged Plumbing: If you discover significant corrosion, a badly cracked pipe, or other extensive damage, it's safer to have a qualified professional handle the repair.
- Lack of Confidence: If you're unsure at any stage, or simply don't feel confident tackling the job, don't hesitate to call for help. For a quick and reliable service, you can tell us your emergency and we'll connect you with a local plumber.
Typically, a plumber's call-out fee in the UK in 2026 might range from £80 to £120 for an initial assessment, with hourly rates around £60-£90 thereafter. Emergency out-of-hours call-outs can be significantly more, often £150-£250 or higher. For a simple trap replacement, you might expect to pay for the call-out fee plus the cost of parts (e.g., £15-£40 for a new trap).
Preventing Future Sink Trap Leaks
- Regular Cleaning: Periodically remove and clean your sink trap to prevent blockages, which can put stress on the system.
- Avoid Harsh Chemicals: Strong chemical drain cleaners can corrode pipes and seals over time. Opt for natural solutions or manual clearing methods.
- Check Connections: Occasionally, gently check the tightness of your trap's slip nuts to ensure they haven't loosened.
- Proper Installation: When installing new components, ensure all washers are correctly seated and connections are tight but not overtightened.
Fixing a leaking sink trap is a common household repair that can save you money and prevent potential damage. By following this guide, you should be able to resolve most issues yourself. However, if you find yourself in over your head or facing a more complicated problem, remember that professional help is always available. You can learn more about how FixDelivered works to connect you with reliable emergency plumbers near you. For more helpful advice, explore our plumbing emergency guides.
Frequently asked questions
Why is my sink trap leaking even after I tightened it?
If tightening didn't work, the most likely cause is a worn, cracked, or incorrectly seated washer or seal inside the connection. You'll need to disassemble the trap, inspect all seals for damage, clean them thoroughly, and replace any that look compromised. A hairline crack in the pipe itself could also be the culprit.
How much does it cost to replace a sink trap?
If you do it yourself, a new plastic sink trap typically costs £15-£40 for parts in 2026. If you call a professional plumber, you'll pay their call-out fee (usually £80-£120 in the UK) plus the cost of the trap and potentially an hourly rate if it takes longer than the initial assessment time. Expect a total of £100-£180 for a simple replacement by a plumber during standard hours.
Can I use strong chemical drain cleaner in a leaking trap?
It's generally not recommended. Strong chemical drain cleaners can be corrosive and may further damage plastic pipes, seals, or even metal traps, potentially worsening the leak or causing new ones. They can also be hazardous if splashed. It's better to manually clear blockages or replace damaged parts.
What's the difference between a P-trap and an S-trap?
Both are types of traps designed to hold water to prevent sewer gases from entering your home. A P-trap (named for its P-shape) connects horizontally into a wall drain pipe. An S-trap (named for its S-shape) connects vertically into a floor drain pipe. P-traps are generally preferred in modern plumbing as S-traps can be prone to siphoning, which can dry out the water seal and allow gases in.
Need a plumber now? Tell us your emergency and FixDelivered will find and confirm an available local plumber near you, usually within the hour.
Written by the FixDelivered Team. Reviewed by Rupert Lowe, Editor. Last updated 2026-09-10.