How to Fit a New Kitchen or Basin Tap: UK DIY Guide
By The FixDelivered Team · Updated 2026-09-16 · 8 min read
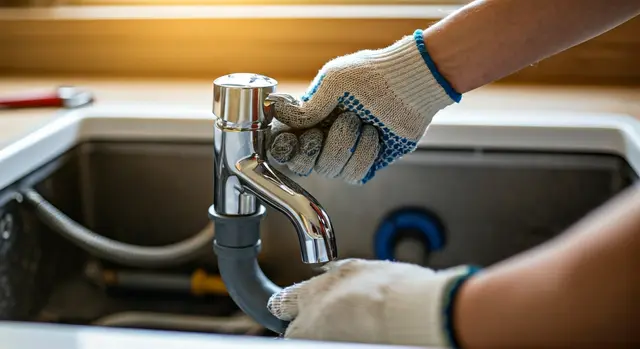
Replacing a tired, leaky, or simply outdated kitchen or basin tap can dramatically refresh the look and functionality of your space. While it might seem like a daunting task, fitting a new tap is a common DIY project that most competent homeowners can tackle with the right tools and a clear guide. This step-by-step article, updated for 2026, will walk you through the process, helping you save on professional installation costs.
Why Replace Your Tap?
Beyond aesthetics, there are several practical reasons to consider a tap upgrade:
- Leaks and drips: A constantly dripping tap wastes water and can lead to higher utility bills.
- Poor performance: Low water pressure or stiff handles can make daily tasks frustrating.
- Outdated style: A new tap can instantly modernise your kitchen or bathroom.
- Improved functionality: Many modern taps offer features like pull-out sprays, filtered water, or touchless operation.
Tools and Materials You'll Need
Before you begin, gather the following:
- New tap: Ensure it's compatible with your sink/basin's tap holes (usually one or two).
- Adjustable spanner: For tightening various nuts and connections.
- Basin wrench (or tap spanner): Essential for reaching and loosening the nuts that secure the tap from underneath the sink.
- Screwdrivers: Flathead and Phillips, for any retaining screws or hose clips.
- PTFE tape: For creating watertight seals on threaded connections (though modern flexi-hoses often have integrated seals).
- Silicone sealant and gun: To create a waterproof seal around the tap base.
- Bucket or bowl: To catch any residual water.
- Sponge and old cloths/towels: For cleaning and mopping up spills.
- Head torch (optional but highly recommended): For better visibility in cramped under-sink spaces.
- Safety glasses and work gloves: To protect your eyes and hands.
- Wire brush or scourer: For cleaning the tap hole area.
Safety First!
Your safety is paramount. Always observe these precautions:
- Isolate water supply: This is the most crucial step. Ensure the main stopcock is fully closed.
- Drain the system: Open the existing tap to relieve pressure and drain any remaining water.
- Electrical safety: If working near electrical sockets or appliances under the sink, switch off power at the consumer unit as a precaution.
- Protect your eyes: Wear safety glasses, especially when working in confined spaces where debris might fall.
- Clear the area: Remove anything from under the sink to give yourself ample working room.
Step-by-Step Guide to Replacing Your Tap
Step 1: Preparation is Key
Clear out the cupboard under your sink or basin. Place your bucket and towels directly underneath the old tap connections. Have your new tap and all tools within easy reach.
Step 2: Isolating the Water Supply
- Locate your stopcock: This is usually under the kitchen sink, in a downstairs WC, or near your main water meter outside. Turn it clockwise until it's fully closed.
- Turn off boiler/water heater: If you have a combination boiler or a hot water cylinder, it's wise to switch off its water heating function to prevent it from trying to draw water while the supply is off.
- Drain the system: Open the existing kitchen or basin tap, along with the lowest tap in your house (e.g., an outdoor tap or downstairs toilet tap), to release pressure and drain residual water from the pipes. Leave them open until no more water comes out.
Step 3: Removing the Old Tap
- Disconnect the supply pipes: Underneath the sink, use your adjustable spanner to carefully loosen the nuts connecting the hot and cold water supply pipes (or flexible hoses) to the base of the old tap. Be prepared for some water to drip out – this is where your bucket and towels come in handy.
- Remove the retaining nut(s): Most taps are secured by a large nut or two smaller nuts, often with a horseshoe-shaped washer, tightened onto a threaded rod that extends from the tap base. Use your basin wrench or tap spanner to reach up and loosen these nuts. This can be the trickiest part due to limited space.
- Lift out the old tap: Once the retaining nuts and supply pipes are disconnected, you should be able to lift the old tap straight up and out from the top of the sink or basin.
Step 4: Cleaning and Preparing the Area
With the old tap removed, thoroughly clean the tap hole area on your sink or basin. Remove any old sealant, grime, or rust using a scourer or wire brush. A clean, smooth surface is crucial for a good seal with your new tap.
Step 5: Installing the New Tap
- Attach flexible connectors (if applicable): Many modern taps come with flexible hoses that need to be screwed into the tap base before installation. Hand-tighten these, then give them a quarter turn with a spanner. Do not overtighten.
- Feed through the tap hole: Carefully feed the flexible hoses (and any threaded rods) through the tap hole from above the sink.
- Secure the tap from underneath:
- From underneath, slide on any rubber washer, then the metal horseshoe washer, and finally screw on the retaining nut(s) onto the threaded rod(s).
- Ensure the tap is straight and correctly positioned on top of the sink/basin.
- Hand-tighten the retaining nut(s) as much as possible, then use your basin wrench to fully tighten them. Be firm, but don't overtighten, as this could damage the sink or tap.
- Apply sealant: Apply a thin, even bead of silicone sealant around the base of the tap where it meets the sink. This creates a waterproof barrier. Wipe away any excess immediately for a neat finish.
Step 6: Connecting the Water Supply
- Connect the flexible hoses: Connect the new tap's flexible hoses to the hot and cold water isolation valves or supply pipes. The hot water pipe is usually on the left, and cold on the right. If your new tap didn't come with integrated seals, apply PTFE tape clockwise around the threads of the supply pipes before connecting.
- Tighten connections: Use your adjustable spanner to tighten these connections. Again, be firm but avoid overtightening.
Step 7: Testing for Leaks
- Slowly restore water supply: Go back to your main stopcock and slowly turn it anti-clockwise to open the water supply. Listen for any unusual noises.
- Check for leaks: With the stopcock fully open, check all connections under the sink with a dry piece of kitchen roll or tissue. Look and feel for any drips or moisture.
- Run the tap: Turn on your new tap, first cold, then hot, running it for a few minutes to flush out any air or debris from the pipes. Check for leaks again while the water is flowing and after it's turned off.
- Address any leaks: If you find a small leak, try gently tightening the connection. If it persists, you may need to disconnect, reapply PTFE tape (if applicable), and reconnect.
When to Call a Professional
While fitting a tap is often a manageable DIY task, there are times when calling in a professional plumber is the best course of action:
- Lack of confidence or time: If you're unsure about any step or simply don't have the time, a plumber can complete the job quickly and efficiently.
- Access issues: If the space under your sink is extremely cramped or difficult to reach, a professional will have specialised tools and experience.
- Old or seized pipework: Dealing with old, corroded pipes or seized connections can be frustrating and riskier, potentially leading to bigger issues.
- No isolation valves: If your existing supply pipes don't have individual isolation valves, you'll have to turn off the main stopcock for the entire house. A plumber can install new isolation valves for easier future maintenance.
- Persistent leaks: If you've tried troubleshooting and still have leaks, it's time to call in an expert.
- Any uncertainty with gas appliances: If you have a gas boiler or water heater nearby and are concerned about safety, always consult a Gas Safe registered plumbers. While not directly related to tap fitting, it's a critical safety point for any plumbing work in proximity.
For quick and reliable assistance, you can find a local plumber through FixDelivered who can handle the job for you. Our platform helps you connect with qualified tradespeople in your area, and you can easily tell us your emergency if you need urgent help.
Common Issues and Troubleshooting
- Drips after installation: Re-check all connections. Ensure flexible hoses are fully tightened, and PTFE tape was correctly applied if used.
- Low water pressure: Check that the isolation valves (if present) are fully open. Also, some new taps come with flow restrictors that might need checking.
- Tap not sitting flush: Ensure the tap hole area was clean and free of debris before installation. The retaining nut(s) might not be tightened enough.
Fitting a new tap is a rewarding DIY project that can save you money and enhance your home. By following these steps carefully, you can achieve a professional finish. However, if you ever find yourself in deep water, don't hesitate to seek expert help. FixDelivered makes it easy to find qualified local plumbers ready to assist. Learn more about how FixDelivered works and book your professional today.
Frequently asked questions
How long does it typically take to replace a kitchen or basin tap yourself?
For a competent DIYer, replacing a tap usually takes between 1 to 3 hours, depending on the complexity of the existing setup and how easily accessible the connections are.
Do I need plumber's mastic or silicone sealant for a new tap?
Silicone sealant is generally preferred for creating a durable, watertight seal around the base of the tap where it meets the sink or basin. Plumber's mastic can also be used but silicone often provides a cleaner finish.
What is a basin wrench and why is it important for tap replacement?
A basin wrench is a specialised tool with a long shaft and a swivelling jaw, designed to reach and tighten or loosen nuts in confined and awkward spaces, such as those securing a tap from underneath a sink or basin.
Can I replace two separate hot and cold taps with a single mixer tap?
Yes, but this typically requires a sink or basin that has a single, larger tap hole. If your current sink has two separate tap holes, you might need to replace the sink itself or use a bridge plate designed to cover both holes and provide a single mounting point for the mixer tap.
How much does a plumber typically charge to fit a new tap in the UK?
As a rough guide for 2026, a professional plumber might charge between £100 and £280 to supply and fit a standard tap. This cost can vary significantly based on your location, the complexity of the job, and the plumber's hourly rates and call-out fees.
Need a plumber now? Tell us your emergency and FixDelivered will find and confirm an available local plumber near you, usually within the hour.
Written by the FixDelivered Team. Reviewed by Rupert Lowe, Editor. Last updated 2026-09-16.