Stop a Dripping Tap: DIY Repair Guide for UK Homes
By The FixDelivered Team · Updated 2026-09-10 · 6 min read
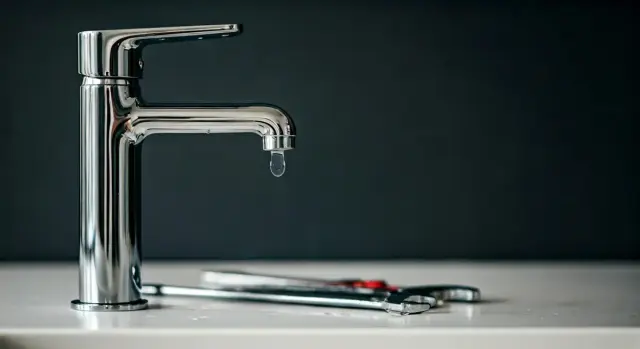
That incessant drip, drip, drip from your tap isn't just annoying; it's also a significant waste of water and money. A single dripping tap can waste thousands of litres of water annually, leading to higher utility bills and potential damage to your sink or bath over time. The good news is that for most traditional compression taps, fixing a drip is a straightforward DIY task that you can accomplish with basic tools and a little patience.
Why Do Taps Drip?
The most common culprit behind a dripping tap, particularly in older or more traditional compression taps, is a worn-out rubber washer. Inside your tap, a rubber washer is compressed against a valve seat when you turn the tap off, creating a watertight seal. Over time, this washer can harden, crack, or degrade due to constant pressure and friction, preventing a perfect seal and allowing water to seep through.
Modern taps, such as ceramic disc taps or cartridge taps, work differently and don't use traditional rubber washers. If you have one of these, the repair process is more involved and typically requires replacing the entire ceramic cartridge or internal mechanism. This guide focuses on replacing the washer in traditional compression taps.
Tools You'll Need
- Adjustable spanner (or specific tap spanner set)
- Screwdriver (flat-head and/or Philips, depending on your tap handle)
- Utility knife or small flat-head screwdriver (for removing old washer)
- New tap washer(s) – ensure you have the correct size and type (e.g., ½ inch or ¾ inch, fibre or rubber)
- Old cloths or towels (to protect surfaces and catch drips)
- Bucket or bowl (optional, for catching residual water)
- Penetrating oil (optional, for seized parts)
- PTFE tape (optional, for re-sealing threads)
- Safety goggles (recommended)
Safety First: Before You Begin
Working with water systems requires a few precautions to avoid floods or damage:
- Turn Off the Water Supply: This is the most crucial step. Locate your home's main stopcock (usually under the kitchen sink, in a downstairs toilet, or near your water meter) and turn it fully clockwise to shut off the water supply to your entire home. Alternatively, if your tap has individual isolation valves underneath the sink, you can turn just those off.
- Drain the Tap: Once the water is off, open the dripping tap fully to drain any residual water from the pipes. This relieves pressure and prevents unexpected splashes.
- Protect Surfaces: Lay old towels or cloths around the work area in the sink or bath to protect against scratches and catch any drips.
- Wear Safety Goggles: Recommended to protect your eyes from any debris or unexpected splashes.
Step-by-Step: Replacing a Tap Washer
Follow these steps carefully to fix your dripping tap:
- Isolate the Water Supply
As mentioned, turn off your home's main stopcock or the isolation valves directly beneath the sink. Once off, open the tap to ensure no water is flowing. This confirms the water supply is fully off and drains the remaining water from the pipework.
- Remove the Tap Handle
Most tap handles have a decorative cap (often plastic or metal) that covers a screw. Gently prise this cap off with a small flat-head screwdriver or your fingernail. Unscrew the screw you find underneath (it could be a Philips or flat-head screw) and carefully lift off the tap handle. Some handles might just pull off or be secured by a grub screw on the side, requiring an Allen key.
- Access the Tap Mechanism (Gland Nut/Spindle)
Beneath the handle, you'll see the tap's main body, often with a large hexagonal nut – this is the gland nut, which holds the tap's spindle in place. Use your adjustable spanner to carefully loosen and unscrew this nut. You might need to hold the tap body steady to prevent it from twisting. If it's stiff, a little penetrating oil can help, but be patient.
- Remove the Spindle and Old Washer
Once the gland nut is removed, you can usually lift out the entire tap spindle assembly. At the bottom of this spindle, you'll find the old, worn-out rubber washer, typically held in place by a small screw or simply seated in a groove. Unscrew or carefully prise out the old washer. Take note of its size and type.
- Replace with a New Washer
Clean the area where the washer sits on the spindle and also inspect the valve seat inside the tap body (the part the washer presses against) for any debris or damage. Insert the new washer, ensuring it sits flush and is secured correctly. If your tap uses a 'jumper' valve (a small brass component with a washer at the end), replace the entire jumper or just the washer on it. You can also apply a small amount of PTFE tape clockwise around the threads of the spindle before reassembly if you wish, to help ensure a good seal and prevent future leaks from the spindle itself.
- Reassemble and Test
Carefully reverse the steps: insert the spindle back into the tap body, tighten the gland nut (don't overtighten, as this can damage the washer or tap), replace the tap handle, and secure it with its screw and decorative cap. Once everything is back in place, slowly turn the main stopcock or isolation valves back on. Open the tap slightly to allow air to escape, then turn it off and check thoroughly for any drips. If it still drips, re-check your work, ensuring the washer is seated correctly and all nuts are snug.
When to Call a Professional
While fixing a dripping tap washer is a common DIY task, there are times when it's best to call in an expert. You should consider contacting a qualified plumber if:
- Your tap is a modern ceramic disc or cartridge type, as these repairs are more complex.
- The tap components are seized, rusted, or you can't remove them without excessive force, risking damage.
- You've replaced the washer, but the tap still drips, indicating a potential issue with the valve seat or deeper internal damage.
- You're uncomfortable working with plumbing or lack the necessary tools.
- The leak is severe, or you suspect it's more than just a simple washer issue.
For these situations, you can quickly and easily tell us your emergency and we’ll connect you with find a local plumber who can help. Our service makes it simple to get a qualified professional to your door, often on the same day, with transparent pricing agreed upfront.
Preventing Future Drips
To prolong the life of your tap washers and prevent future drips, avoid overtightening your taps. Turning them off with excessive force can prematurely wear out the washer. Regular gentle use and occasional inspection can help identify potential issues before they become major leaks.
Need Expert Help?
If your DIY efforts don't resolve the issue, or you're dealing with a more complex plumbing problem, don't hesitate to seek professional assistance. FixDelivered connects you with qualified, local plumbers across the UK, ensuring reliable and efficient service. Our booking process is straightforward, and the plumber's call-out fee is agreed with you before any work begins, so there are no surprises. Learn more about how FixDelivered works or explore our plumbing emergency guides for more helpful advice.
Frequently asked questions
How much does a plumber charge to fix a dripping tap in 2026 UK?
Typically, a plumber's call-out fee and first hour of labour for a simple job like replacing a tap washer in the UK can range from £80 to £120. This usually includes minor parts like a washer, but complex issues or additional parts would incur further costs. Using FixDelivered allows you to agree on the plumber's call-out fee upfront.
Can I use any tap washer for my dripping tap?
No, tap washers come in various sizes (e.g., ½ inch, ¾ inch) and materials (rubber, fibre). It's crucial to use the correct size and type for your specific tap to ensure a watertight seal. It's best to remove the old washer and take it to a hardware store to match it, or measure it accurately.
How long does it typically take to replace a tap washer?
For someone with basic DIY skills, replacing a tap washer usually takes between 30 minutes to an hour. This includes isolating the water, disassembling, replacing the washer, and reassembling. If parts are seized or you encounter unexpected issues, it may take longer.
Need a plumber now? Tell us your emergency and FixDelivered will find and confirm an available local plumber near you, usually within the hour.
Written by the FixDelivered Team. Reviewed by Rupert Lowe, Editor. Last updated 2026-09-10.